+2712 88 00 258
KB20230405/01: Sage 200 Evolution Tip & Trick – How do you use the “Find changes to this record” feature?

What is the “Find changes to this record” feature on the document Maintenance screen (e.g.. GRV, INV, PO, SO etc.), and how do you use it?
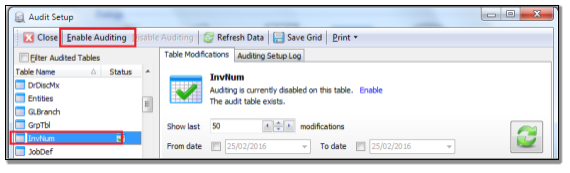
This feature works in co-ordination with the Audit Tool. To track changes to a document, you will need to enable the Audit Tool’s tracking abilities in the INVNUM table.
Let’s explain further by making use of the following scenario:
Step 1 – Capture a new Inventory Invoice but don’t process it yet.
Step 2 – Enable the audit Tool on the INVNUM table.
Step 3 – Open the same invoice and this time enter an External Order Number value on the header and process the document.
Step 4 – Go to Administration | Utilities | Source documents | Change Document customer or supplier
Step 5 – Find the invoice, change its customer to NICE and save the change.
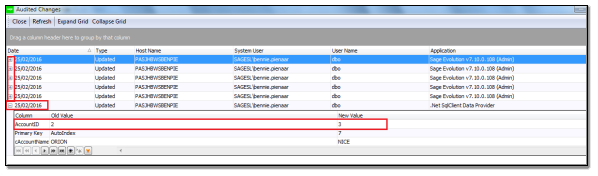
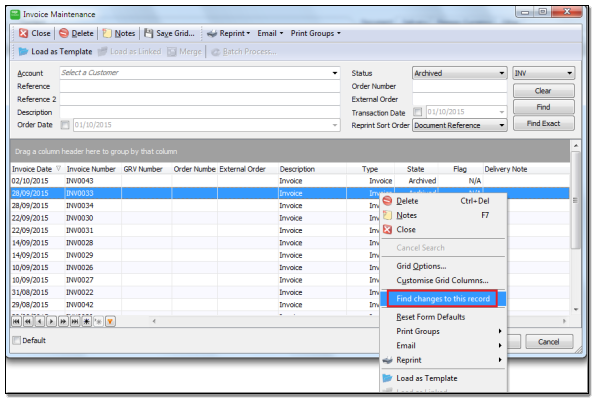
Step 6 – Back on the Invoice Maintenance screen, find the invoice, right-click on it and select the Find changes to this record option.

Step 7 – On the Audited Changes screen that opens, the user can now expand each change set to view the details by selecting the + icon on the left.
Step 8 – For example, notice the AccountID changing from 2 to 3 in correspondence with step 5 above.