+2712 88 00 258
Sage 200 Evolution Tip & Trick – How to capture Additional Costs on a Procurement Purchase Order.

A significant duration may exist between the first and the last agent’s steps in the workflow. This makes the relevant additional costs at the time of the first agent’s workflow step redundant when the final step is reached. You may also notice that any agent in the Purchase Order authorization workflow other than the first agent in the workflow, is not able to properly add Additional Costs on the main PO’s transaction lines.
Apply the steps in the scenario below to achieve the above outcome.
Phase 1: Setup
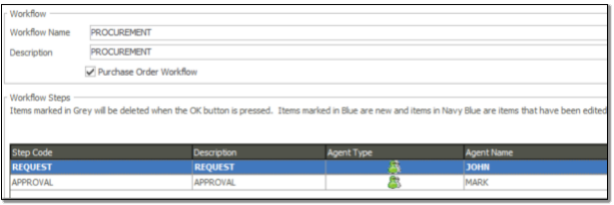
1. In this instance there are two steps in the Workflow as can be seen below
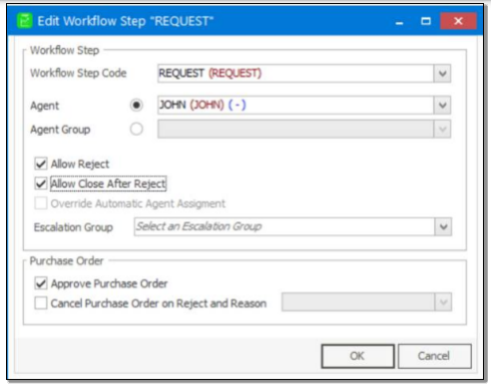
2. The REQUEST step has been setup as below.
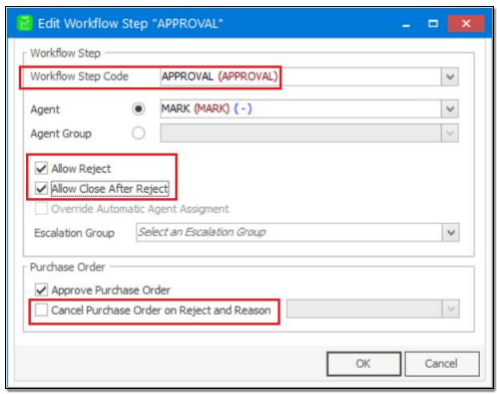
3. The APPROVAL step has been setup as below.
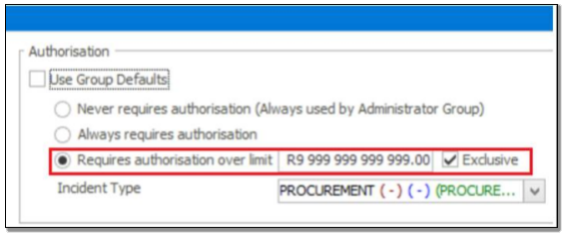
4. On the Agent Administration screen for agent John | Purchase Order tab, notice the setup for agent John (part of Step: REQUEST in the workflow above).
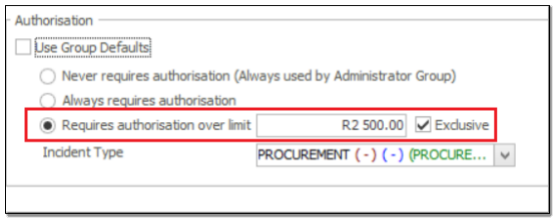
5. On the Agent Administration screen for agent Mark | Purchase Order tab, notice the setup for agent Mark (part of Step: APPROVAL in the workflow above).
Phase 2: Processing
1. Agent John logs into the company.
2. John opens a new Purchase Order and captures all fields/lines. When done he clicks the Request Approval button.

3. Agent John now goes to the My Desktop | My Authorizations node, finds and opens the PO approval record waiting for him.

4. In the opened incident he clicks the New Action button.
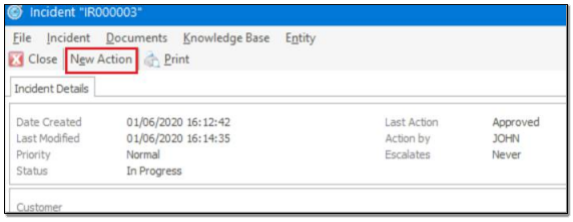
5. Click the View Purchase Order button.
6. John views and then closes the Purchase Order (PO).
7. On this screen he captures the phrase in the body of the incident below and then clicks the Approve button.
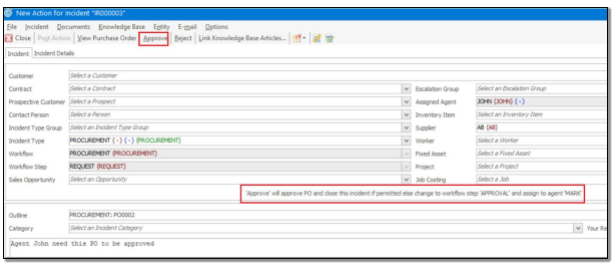
8. Agent Mark logs onto the company. This agent may open the PO a substantial amount of time after agent John started the PO. For example, it is a month or two later and the Additional Costs may have increased in the interim. This explains why agent John could/should not have entered any Additional Costs when he initially created/requested approval in steps 2 or 6 above.
9. Agent Mark goes to My Authorizations and opens the record waiting for him.

10. Mark clicks the New Action button.
11. Mark clicks the View Purchase Order button.

12. Agent Mark now inspects and evaluates the opened PO to confirm that he is satisfied with all the values e.g., transaction lines, selected Supplier, etc.
13. Mark closes the PO when done.
14. Back on the same screen as in step 11 above, Mark enters the phrase below and then clicks the Reject button.
‘This PO is approved in principle To Agent John: Please capture the current Additional Cost on the PO0002 and return it back to me’
15. Repeat steps 3 – 5 above (for agent John).
16. In the opened PO, John clicks on the Importation Split option and then clicks the Split Allocation button.

17. He captures the relevant additional cost values as below and then clicks the OK button. Notice at this stage the negative Difference value.
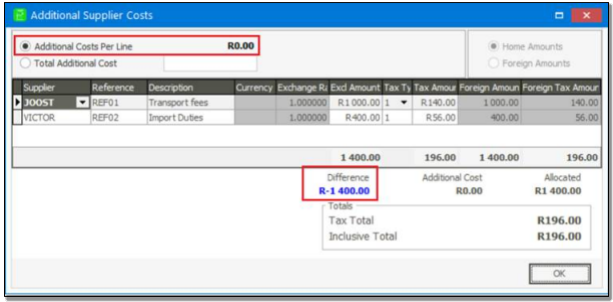
18. On the main Purchase Order transaction screen John enters the various additional cost values per transaction line.
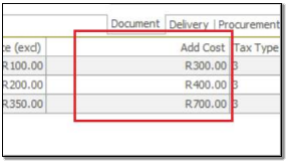
19. John goes back to the Importation Split screen and confirms that all costs have now been allocated. Notice the Difference below is now zero as expected.
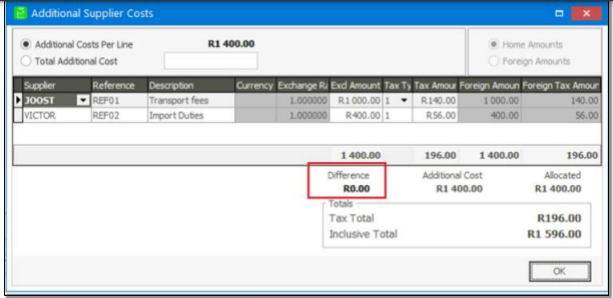
20. Back on the main transaction screen it may also be required to simply recapture the Price column’s values in all transaction lines. It may in some cases be required as Evolution may ‘lose’ these values.

21. Still on the main GRV screen click the Request Approval button.
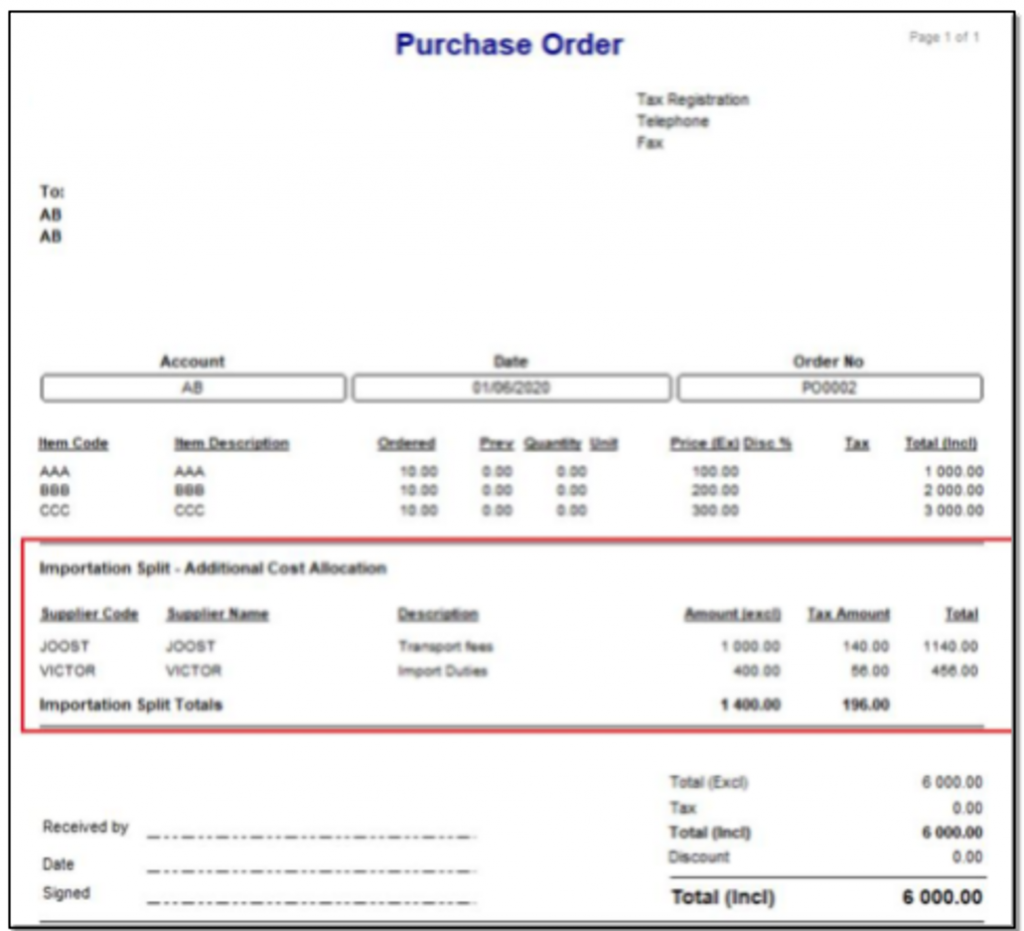
22. View the printed PO and all should look fine as expected, especially the Importation Split section below.
