+2712 88 00 258
KB20230504/01: Sage 200 Evolution Tip & Trick – Setup and process a Scheduled Inventory Count.

Setup and process a Scheduled Inventory Count.
Step 1 – Assign responsible agent
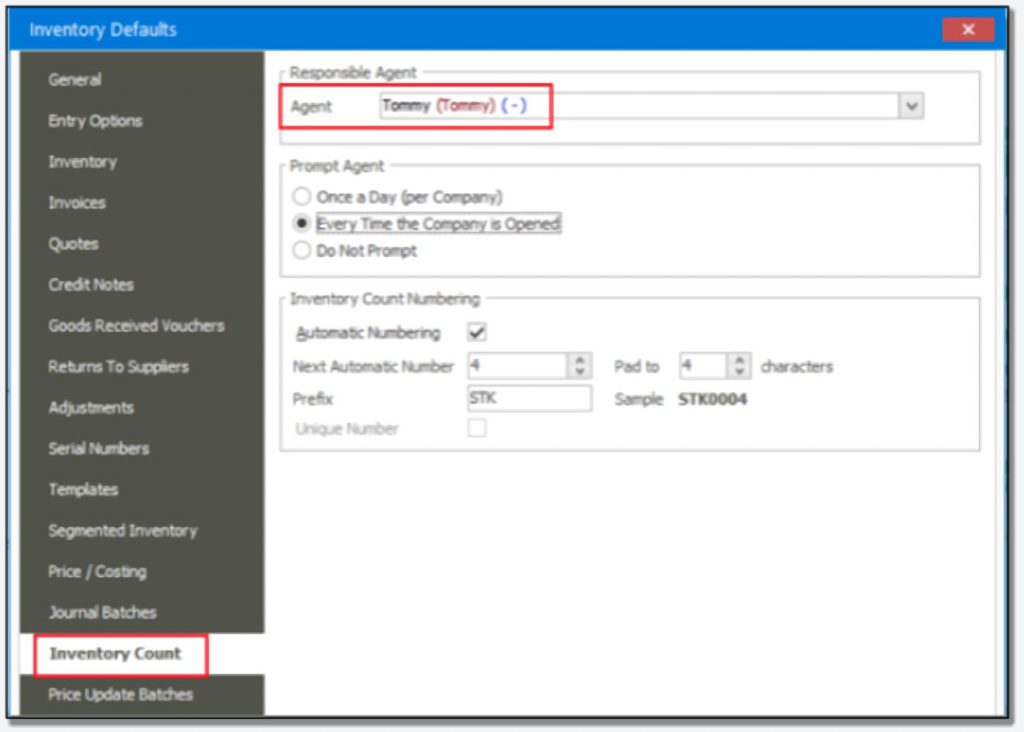
1.1 In the company, go to Inventory | Maintenance | Inventory Defaults
1.2 In the Inventory Count tab, select the relevant again that will be responsible to attend to Scheduled Inventory Counts.

Step 2 – Create new Inventory Count
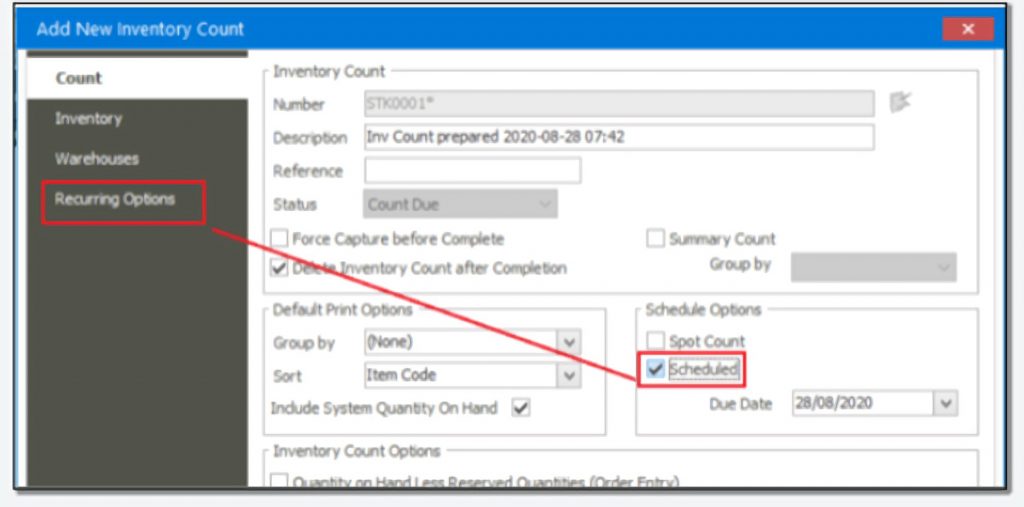
2.1 When you create a new scheduled Inventory Count, select the Scheduled option and then notice the Recurring Options tab display.

2.2 In here, setup the frequency of the scheduled counts.

2.3 When the new Inventory Count setup is saved, you’ll notice it has a status of Count Due on the Inventory Count Maintenance grid.

Step 3 – Activation of the Inventory Count and commencing with the count
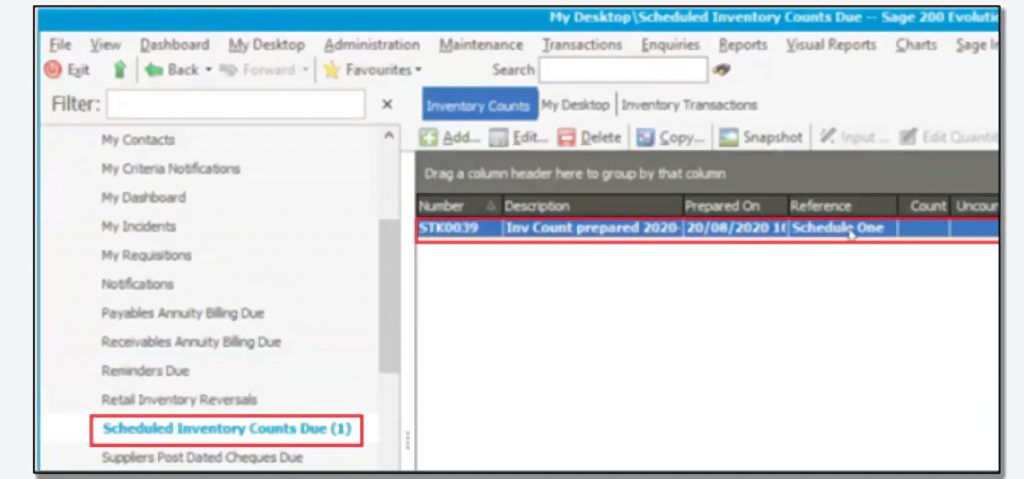
3.1 When the agent as selected in Phase 1, step 1 above logs into the company, on the relevant date in accordance with the actual schedule setup in Phase 2. Step 2 above, he should notice the Count Due record under My Desktop | Scheduled Inventory Counts Due.

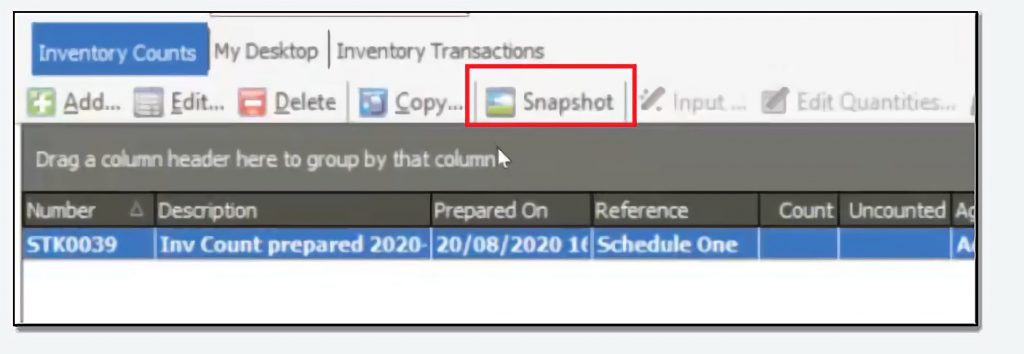
3.2 In here select the record and click the Snapshot button.

3.3 Finally, you’ll notice the buttons marked below are now active and can therefore continue as normal with the Inventory Count.

