+2712 88 00 258
KB20210630/01: Sage 200 Evolution Tip & Trick – How to setup Direct Bank Feeds between Sage 200 Evolution and First National Bank (FNB).
In the “old” days, accountants and business owners would spend hours looking over printouts and spreadsheets to manually capture information from bank statements into their hard copy ledgers.
Not only was this time consuming, but it was also prone to errors. Mistakes would only be detected when the books didn’t balance, and they would have had to start all over again. That is a lot of time and energy wasted on balancing the books.
Introducing bank feed integration with First National Bank (FNB).
Bank feed integrations aren’t new. Banks all over the world have been using them for more seamless, secure and convenient book-balancing processes.
Now, First National Bank (FNB) has joined the movement with Sage, to help small and medium business owners automatically import transaction history details directly from their FNB Business Banking accounts, eliminating the need for third parties or manual transaction downloads and entry.
Aside from the accuracy, time-saving capabilities, and immediate value that this solution provides, direct bank feeds are also secure, convenient, and efficient.
There’s no need to share your banking details with the third parties involved, no late-night SMS login notifications, and more control of your banking.
How does the First National Bank (FNB) bank feeds work?
Bank feeds are designed to simplify the process of transferring financial transaction history from FNB into your Sage Accounting solution via a secure application programming interface (API) – at no cost to you. The process is effortless and automatic, and your online banking credential details are always protected.
Another thing that makes this so efficient is that there’s minimal setup time. The connection is made within your Sage solution in just a few simple steps, and it’s an automatic process that can be repeated with a few clicks.
This is how you setup your bank:
- Log into your online banking platform.
- Click “Business Solutions” and then “For my Business.”
- Select “Open banking partners.”
- Connect to Sage Accounting
- Complete ‘Bank Feeds’ by selecting the accounts you would like to integrate into Sage Accounting.
- Submit the authorisation code you receive.
With a direct bank feed set up, your transaction history details are regularly imported into your Sage accounting application, allowing you to create or match transactions. You can also create rules that will map certain transactions so that they happen on a recurring basis. The great thing is it’s set up once, and financial transaction history is imported until you unsubscribe/stop the transfer.
More reasons to activate FNB and Sage bank feeds:
- It makes accounting invisible for FNB business customers
- You have more time to focus on strategic tasks
- Eliminate some of the manual and administrative processes associated with bookkeeping and bank reconciliations
- Dramatically reduce errors and duplications
- And you’ll always have a real-time overview of your client’s finances
As an accountant, you’ll also have more time to offer your clients business advice, because the hassle of bookkeeping has been eliminated. You can add additional value to your clients, by helping them with financial planning and strategy, business development, and forecasting.
- To set up your connection with Sage and FNB, you need to have a Sage subscription.
- There are no additional fees to use the service.
- If you have an existing FNB bank feed set up, you will need to replace the existing Sage Accounting bank feed with an FNB Direct Bank Feed. You can access a User Guide on FNB online banking or the FNB app for help with the connection process.
- Check the date of your last manually imported or captured transactions. Set the FNB Direct Bank Feeds import start date from then to avoid duplicate transactions in Sage Accounting.
- There is no limit to the number of FNB Business Banking accounts that can be linked.
- If you are an authorised representative, you will be able to set up and authorise the bank feeds solution on behalf of your client. If you don’t see the tab, it means you don’t have authorisation to perform this task on behalf of your client.
Setting up Bank Feeds (Apply the following steps to setup Bank Feeds):
Step 1 – Identify which GL Account is your company’s main bank account by going to General Ledger| Maintenance| General Ledger Accounts. This can be a newly created or existing General Ledger Account of the account type Cash or Cash Equivalents.
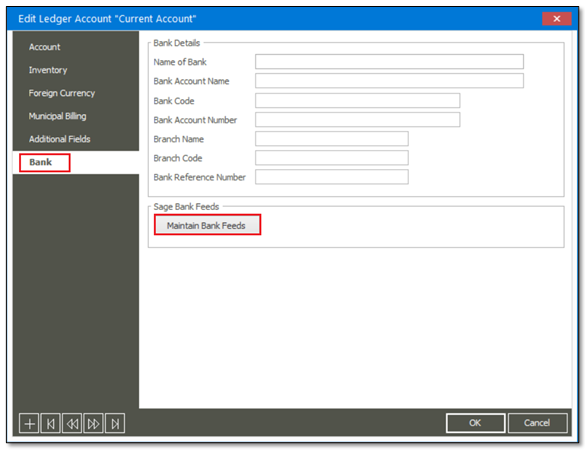
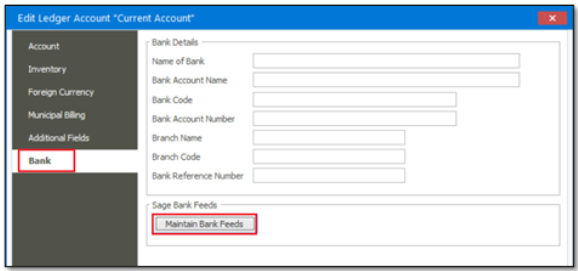
Step 2 – Open/create the GL account that will be used as your Bank account and go to the Bank tab. Notice that the Bank tab only appears if the Account Type = Cash or Cash Equivalents.
Step 3 – Click on the Maintain Bank Feeds button as marked below.
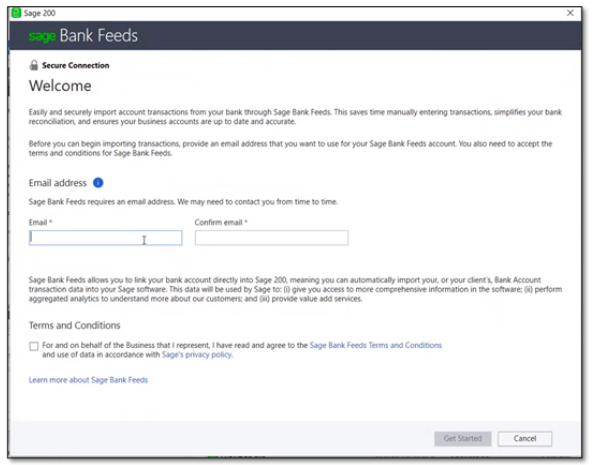
Step 4 – When Setting up Bank Feeds for the first time, you should be prompted to enter and confirm an E-mail Address. In here also accept the Terms and Conditions.
Note: This E-mail will be used for all communications related to bank Feeds (Admin Email).
Step 5 – When done, click the Get Started button above.
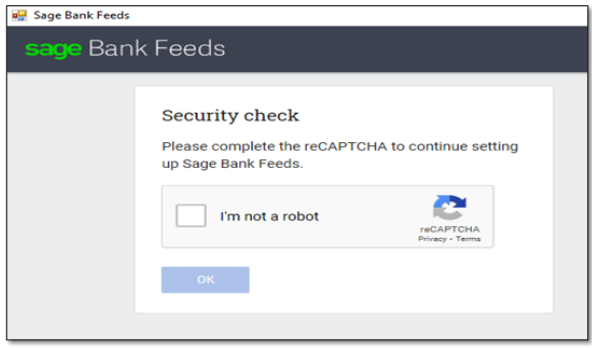
Step 6 – On the next page, select the I am not a robot option and click OK.
Step 7 – On the captcha form that displays, follow the instructions to confirm the images
If you click on OK and you receive an error that your account could not be created, it could be because a timeout occurred if your captcha verification took too long. You can then just try again.
Step 8 – When Successful, the “I am not a robot” check box will be completed, and the next step will be available.
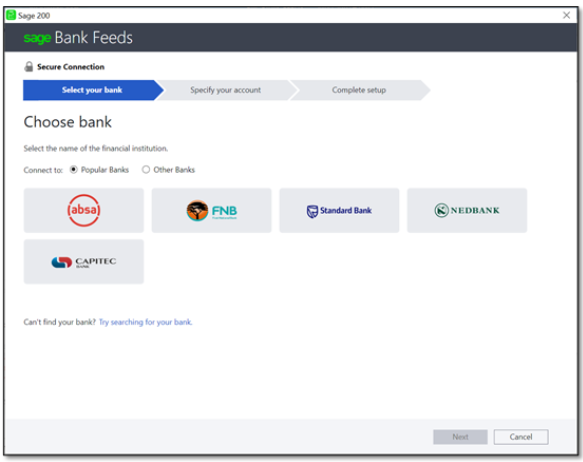
Step 9 – On the Bank Selection screen, notice the following:
The Banks shown in this screen will be country specific, e.g., if your Evolution company country is South Africa, only South African banks will appear in the screen.
The Banks in this list will by default be the top banks in the Country.
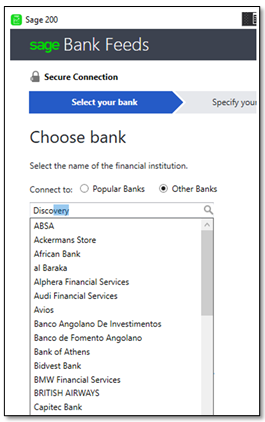
Step 10 – If the bank you are looking for does not appear in the top banks, you can use the “Other Banks” radio button to find other banks.
Step 11 – The “Try searching for your bank” link can also be used to search for banks.
Step 12 – Sage Demo Bank
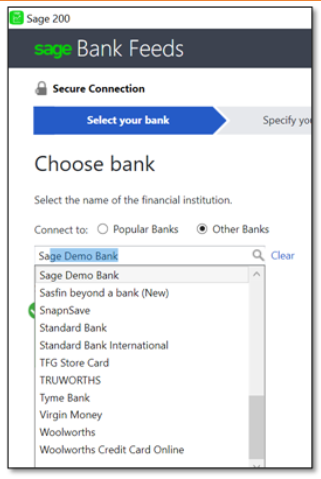
The Sage Demo Bank has been setup by the Banking Cloud team for testing purposes. To use the Sage Demo Bank, click on Other Banks and type Sage Demo Bank.
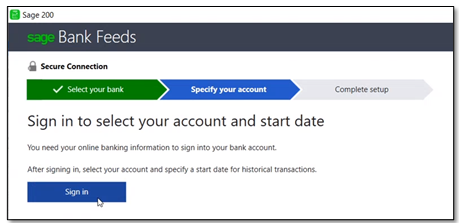
Step 13 – On the Next Screen, you will be prompted to Sign into the Bank Account, Select Sign in to log into the Account
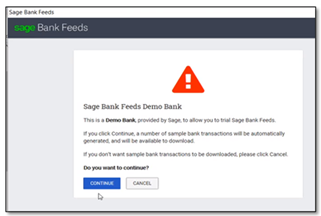
Step 14 – When using the Demo Bank, the below screen will appear. Click the Continue button below.
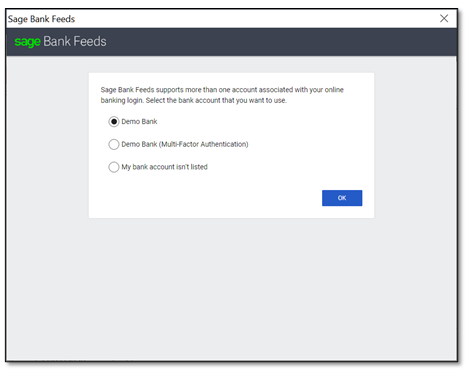
Step 15 – Now select the relevant option among the following list:
- Demo Bank: This account is a normal savings account with an active status. You will immediately be able to retrieve transactions from the account.
- Demo Bank (Multi-Factor Authentication): This account is a normal savings account with an authentication required status. You will need to re-authenticate the account before retrieving transactions from the account. This is to simulate multi-factor authentications.
- My bank account is not listed: This is an option to add your bank or bank account if you cannot find it in the list.
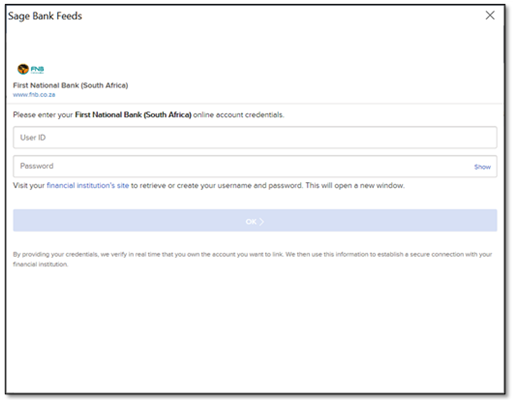
Step 16 – When using a normal Bank Account, the screen below will appear.
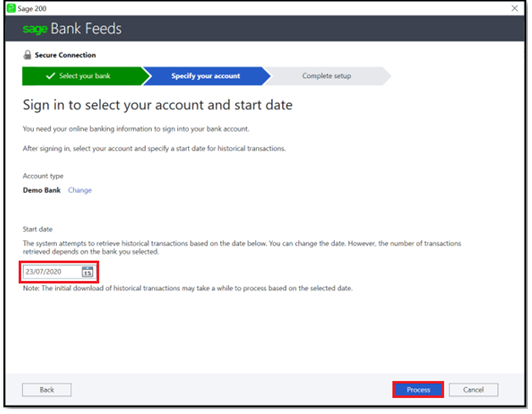
Step 17 – Once the login/setup process is complete, select the transaction Start Date and click the Process button.
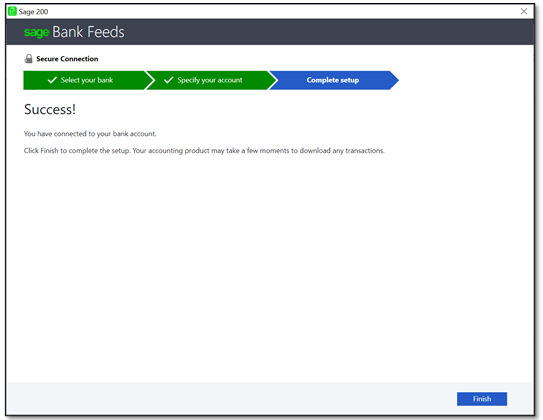
Step 18 – If all goes well, the Account setup process should be completed by the message displayed below. Click the Finish button below.
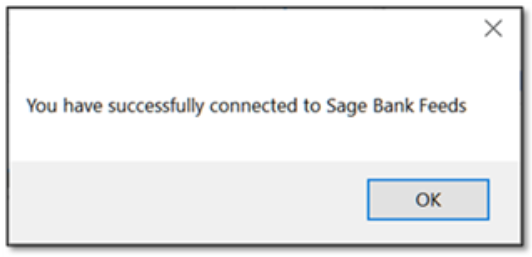
Step 19 – Finally, click the OK button below.
At this point, The GL Account can be used on a Cashbook Batch to import transactions using the Bank Manager
Reviewing current Bank Feeds setup and status
To further maintain Bank Feeds, do the following:
Step 1 – Go to General Ledger| Maintenance| Accounts, click on the Bank tab
Step 2 – In here click the Maintain Bank Feeds button.
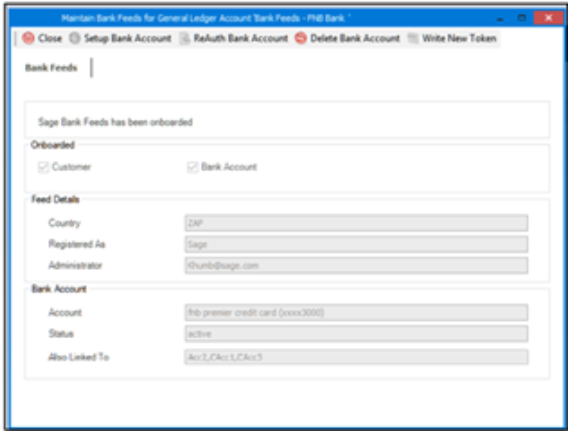
Step 3 – The Maintain Bank Feeds screen opens. This screen can be used to view the Client’s Bank Feed registration information.
Step 4 – The above fields are categorized in the following sections:
Onboarded Section
This section indicates if a Customer and Bank Account have been setup for this GL Account. For a new onboarding, none will be ticked.
Feed Section
Country:
Indicates the country relevant to your Bank Feeds setup.
Registered As:
This is the Name field from the Registration table, i.e the Company Name sent as part of the onboarding process to Sage Bank Feeds. This links to the Company ID returned from Sage Bank Feeds after onboarding.
Administrator:
This is the admin email that you entered on the onboarding process. This email is linked to the organisation. The admin account will be used for all communication to Sage Bank Feeds.
Bank Account Section
Account:
As part of the onboarding process where you linked your bank account, Sage Bank Feeds generates a unique ID that links your organisation and company to that bank account.
This ID is sent back as part of the onboarding process. If that bank id is present in the Accounts table on the GL Account where you linked the Bank Account, the name of the Bank Account as retrieved from Sage Bank Feeds will be displayed here.
Status:
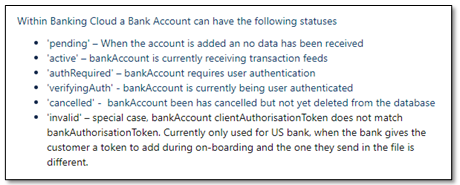
This is the active status of the above setup. Bank accounts can have one of the following statuses.
If you chose “Demo Bank (Multi-Factor Authentication)” when selecting the bank account on the Sage Demo Bank, the status here would be “authRequired”.
Also linked to:
If this bank account is linked to more than one GL Account, the other linked GL accounts will be listed here as comma delimited
Importing Bank Transactions into Cashbook
Do the following to import bank transactions into your cashbook using Bank Feeds.
Step 1– Navigate to General Ledger | Transactions| Cashbook Batch.
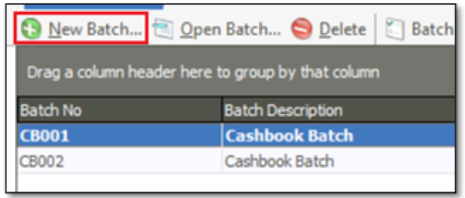
This will display a list of your current cashbook batches.
Step 2 – Click on the New Batch’ to create a new batch.
Step 3 – On the Cashbook Batch Properties screen, click on the Integration tab below.
Step 4 – In the GL Accounts group box, select/enter the GL Account with the linked bank account in the field ‘Bank’.
Step 5 – Click on OK to save your changes.
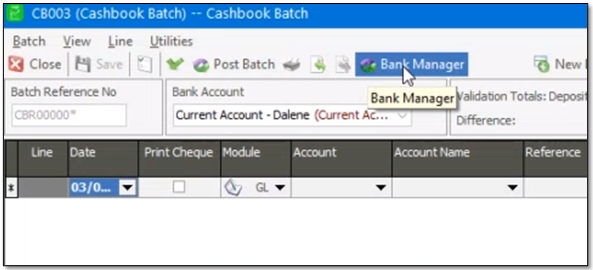
Step 6 – The Cashbook batch screen should open and display. Click the Bank Manager button below.
Step 7 – A Statement Summary screen should be displayed with balances information.
Step 8 – Click on Continue.
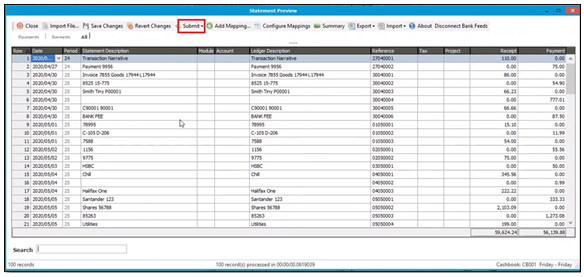
Step 9 – A list of the transactions retrieved from Sage Bank Feeds will populate as below:
Step 10 – Finally, note that only when you click on the above Submit button are the transactions finally imported into the cashbook (and not yet posted to the GL).
For more information please contact us on info@sysfinpro.com or by phone on +2712 88 00 258.
